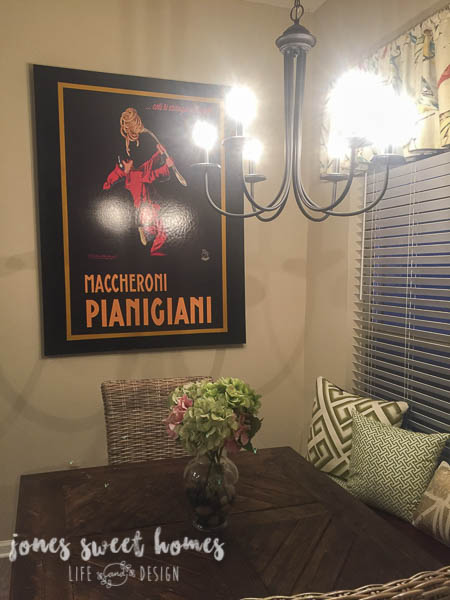
Do any of you have things in your house that you stare at for basically ever, thinking “I don’t really love that”, but you never do anything about it, until suddenly one day you just can’t stand the sight of it for one more second and it has to go literally right then? Yeah, me too. The mantel (or lack thereof) in our last house was one, and this canvas in our current breakfast nook was another. I had to change it ASAP and wanted to make my own giant canvas transfer… but how?!

It worked well in our old house where we had the pool table set up, but in our new house it was waaaaaaay darker than everything else in the space and was starting to depress me every time I looked that creepy, pasta-eatin’ dude in the eye. The problem was that I wanted something about the same size, and this sucker is ginormous. And ginormous art is expensive. Enter my font and drop cloth obsession and the idea for an inexpensive canvas transfer.

See how big it is? And also how it kinda harshes the vibe of the happy white and green pillows?
I wanted something personalized, that fit a bit of a farmhouse vibe, and with a much lighter background. I got the idea to make my own giant canvas transfer using the existing Depresso Pasta pic as my frame. If you don’t have a giant, creepy canvas to use as your frame, first of all good for you, and secondly, you could very easily make a frame using 1×2’s from any home improvement store.
Here is what I used for my Canvas Transfer:
- A canvas drop cloth
- Automatic Staple Gun
- Regular ol’ printer paper
- Fonts from Creative Market
- Painter’s Tape
- X-acto knife
- Cutting mat
- Sharpies
- Stencil Brushes
- Craft Paint
I perused Pinterest and Etsy to get some inspo for the type of sign I wanted to make, and eventually landed on this design that I created in Microsoft Word with a multitude of giant text boxes.

I’m completely infatuated with typography and fonts, so it took an inordinate amount of time for me to look through every available font download in the universe to choose these two. The scripty one is called “Angeline” and the handwriting-ish one is “Moonflower Bold.”
Because this print out needed to be LARGE to fill my entire canvas transfer, and because I wanted to use my home printer and normal size paper, I made huge text boxes on my Word doc, grouped them together, and then shifted the one large text box around to print each section piece by piece.

See? The white box behind the words “wholesale” and half of the word “grocers” is the outline of the 8’5″ x 11″ piece of paper and all that printed on this particular page was the “& WHOLESAL” and the “CERS”. I shifted the large text box around until I had all sections printed, and then I lined them all up and taped them together.
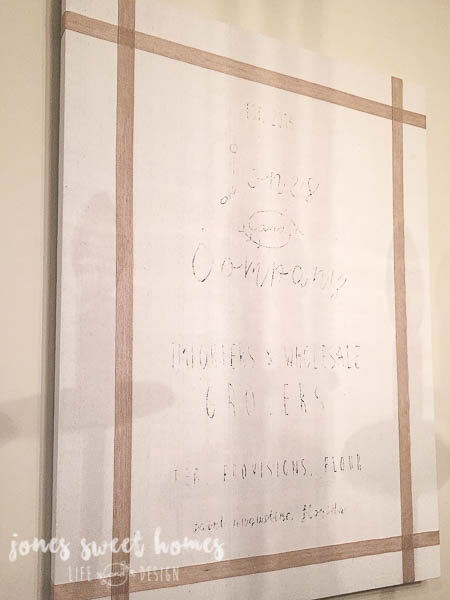
Next it was time to cover up the spooky little pasta man. I spread out the drop cloth and placed the canvas face down in the center of it.

Next I stapled it on one of the short edges (with a few inches between each staple and leaving about 1-2″ from the last staple to the corner), and then went to the opposite side, pulled the canvas taught, and followed the same stapling procedure. Then I did the same thing with the long sides. This part is pretty simple. The corners are where it gets tricky, but thankfully because you’re smart and follow directions, you will not be like me and have to remove 47 staples in order to wrap them properly. If you leave 1-2″ between the corner and the last staple on each side, you will have something that looks like this.

Fold this little section of the canvas into a point, hold it down with one finger in the center, and pop a couple of staples into it. The canvas, not your finger. Be careful.


Next it was time to transfer all of the words onto the canvas. I originally tried transfer paper, but it did not work well for whatever reason. I’m 99% sure it was user error, but it was too difficult and I was too annoyed, so I trashed that plan. Because I of course wanted this thing finished NOW, and it was way past the hour that any craft store would be open, Lane came up with the idea to use Sharpies to bleed the words through onto the canvas.
I next took all of the printed pages and cut through the words with a x-acto knife, so that it would be easier for the Sharpie to bleed through. Once that was done and the papers were taped onto the canvas it looked like this:

I then traced over all of the cuts with a big, fat Sharpie.


In the pic above, the top half has already been traced, the “importers” has been colored with Sharpie, and the rest is waiting to be colored. When this step was done, since I’d basically given myself carpal tunnel from all of the coloring, I hung it up and took a break for the night. Already much less creepy.

I used a glue gun to add this burlap ribbon to the edges of the canvas to add some texture and visually shrink the area for the words down a bit.
The next day it was time to do the part I’d been waiting for since starting this project – paint it! I used little stencil brushes and these craft paints that I got at Wal-Mart. They were only $0.50 each and I wanted to buy every single color.


I stood the canvas up in our kitchen to paint it, and that meant that little hands ended up in the paint and smeared down the “Provisions” part of the canvas. When my knee-jerk reaction was to say “Lila no!” a sticky-outy bottom lip and alligator tears resulted, so guess who got to help paint the rest of the entire thing with Mommy holding her?

Once the words were all painted, I added the red and green accent colors, and then squirted out some of the gold paint on a paper plate and dipped the plunger part of a plastic medicine syringe (I was improvising people!) in the paint, and used it like a stamp to create the dotted lines.

I think the total cost of this project was about $12-15 and I just love the way it turned out. We get compliments on this canvas transfer all the time and the best part is that there’s no more scary pasta guy to give me nightmares.

Ahhhh, much better. What do you think? If you give it a try, let me know!

Katie,
What a creative idea. I love the new canvas in your breakfast room. Good for you for completing the project with help from your toddler. Thanks for sharing at Your Inspired Design Link Party.
Carol@blueskykitchen recently posted…15 Inspirations for Fall Decorating Ideas