One of the things that makes a new house feel the most homey to me is getting stuff up on the walls after you move in. In our family room above the sofa, I tossed up a piece that I had on the wall in our old living room. I loved it in our old house, but it was just a little boring in the new space. I tried layering my DIY Magnolia Leaf Wreath over it, but it was still blah. I had this wall space in the back of my mind as a “to-do”, when a ginormous cow print that I happened upon at Lowe’s stopped me in my tracks! His sweet little moo cow face was all the inspiration I needed for what would be perfect on this wall, enter the quick and easy DIY Farmhouse Shelf!

The cow, now affectionately referred to as “Thomas the Cow”, was way out of my normal style, so I passed him up the first time I saw him. But, I couldn’t get the sweet little fella out of my head. (If you follow me on Instagram, you already know of my internal struggle with this purchase!) So the next day I went back to grab him.
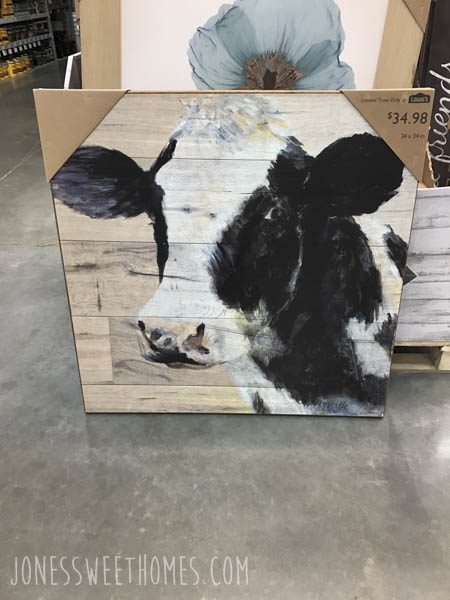
How could I have left this little fella just sitting there on the cold concrete?!
I had a brief moment of panic when he wasn’t in the exact same spot, but after a little digging, I discovered him in a barn of a cardboard box, just patiently waiting for me. I knew this fella would need some company on the wall, and I wanted a place to put my freshly cut DIY Faux Boxwood Wreath too, so I knew I needed a shelf to go under the 34″x34″ cow face canvas to which I’d just committed.
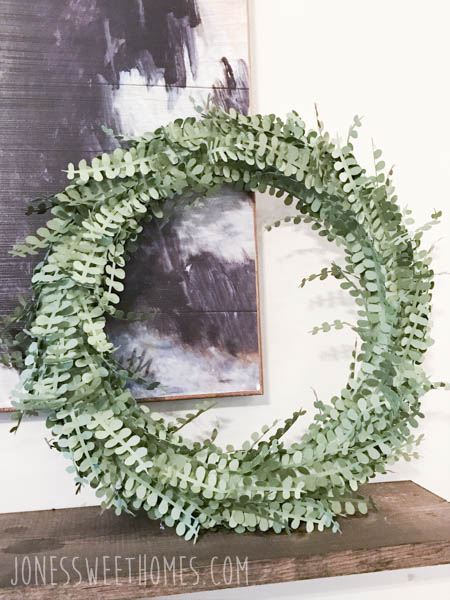
Tutorial on this DIY Faux Boxwood Wreath coming soon!
I started at my go-to source, Amazon Prime, but Y’ALL. Pieces of wood to go on your wall are expensive! Plus I didn’t see anything that I really liked. I was convinced I could make my own lovely shelf for a fraction of the price, so that’s just what I did.
For this project you’ll need:
- Two unfinished wall brackets
- Piece of stain grade wood, approx. 6″x48″
- Wood Stain
- Foam Brush
- Rag
- Rubber gloves
- Level
- Screws (with wall anchors)
- Drill, screwdriver, or cordless screwdriver
All of my supplies came from Lowe’s, and some of the stuff I had on hand. The wall brackets were located in the wood section, with other small trim pieces and such, and were $5 each. You’ll be tempted to skip the “stain-grade” wood for the actual shelf since it’s a bit more expensive, but don’t. It really does make a difference in the finished product. The piece that I got for the top of the shelf is 6″x48″ and I think it was $8.
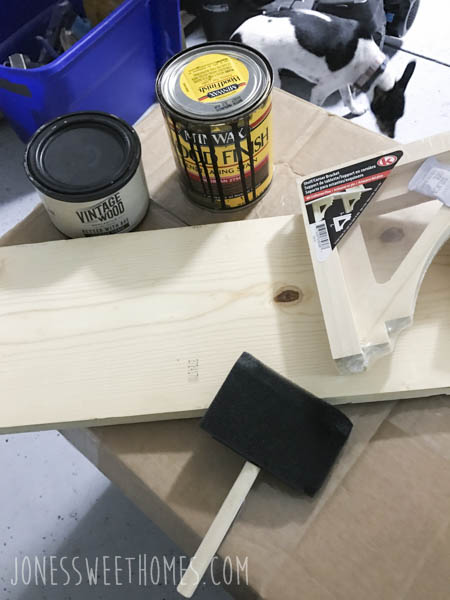
I ended up and didn’t use that vintage wood stain. I want so badly for it to be grey and so far everything I’ve tried it on has just turned yellow. Also, please note my hodge-podge dog/project helper in the background.
I used Minwax Jacobean stain and a foam brush to stain it. *Pro tip: If you’re lazy resourceful like me and you just dip the stain straight out of the can, make sure to get a foam brush that will fit inside the can. I got a larger one because I thought it would make the staining go faster, and then was super annoyed when I had to cut it down to fit.
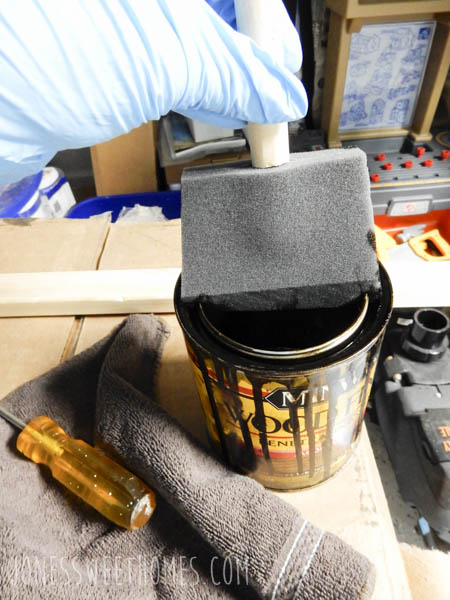
Doh.
Step One: Stain your wood.
Of course make sure to work in a well-ventilated area (particularly if you’re, ahem, pregnant), and wear gloves. I usually skip the gloves when painting (see above about “resourcefulness”), because I know I can scrub the paint off, but stain is a different story. It, ummm, stains. So wear gloves.
Brush on one layer of stain to one side of each of the brackets and board. Try to go with the grain of the wood. Wipe off with your rag.
I think I only waited like seven minutes to flip them over and stain the other sides, ’cause you know, #patience, and then I let them all dry for about an hour before attempting to hang them on the wall.
Step Two: Mark your wall.
I needed this shelf to be high enough that people wouldn’t hit their heads when they sat on the sofa, but far enough below Thomas that I could display a few things without blocking his lil face. I ended up hanging it about 6″ below the bottom of the canvas.
The brackets that I got conveniently had hangers on the back, so all I had to do was figure out what height I wanted the top of the shelf, and then measure down one inch. I marked where I wanted the center of the shelf, and then measured out one foot each way (this works well for a 4′ shelf, for longer widths you may want to adjust to avoid a see-saw effect) with my level, and marked where I needed to drill in the screws for the brackets.
Then I drilled the screws into the wall with my handy-dandy cordless screwdriver. Sidenote: I bought this cordless screwdriver in desperation, since I complete most of these projects to keep myself occupied while the hubs is traveling for work and he takes the good drill with him. Grrrr. Surprisingly, I have used it a ton and it works like a charm for things like this project, removing cabinet hardware, hanging curtain hardware, etc. It was a $20 impulse purchase that turned out to be well worth it, so if you don’t have one, I suggest the splurge!
Step Three: Hang the brackets.
Umm, that’s really all there is to this step, other than making sure they’re straight. Just pop the level on top of both brackets at the same time and that should do it.


Step Four: Attach the shelf.
Confession: I just placed the shelf on top of the brackets and I set the rest of my accessory stuff up immediately so I could just see what it would look like (and because I have the attention span of my two year old)… and I’ve never gone back to officially attach the shelf. I was planning on just screwing in two small screws from the top of the shelf into the brackets. And someday in a fit of OCD, I might. But for now, isn’t it cuuuuuuute?!


This project took a total of maybe two hours (an hour of that was just waiting for it to dry) and cost $18 since I had the stain on hand. I love the way that it turned out, and I love that it provides an additional little “mantel” space to decorate for holidays.
Things I did not do, but that you probably should:
I didn’t use wall anchors with the screws. I don’t like them because it gives me anxiety to punch a hole that ginormous through the drywall. Plus I knew I wouldn’t be putting anything heavy on the shelf. If you will be though, use wall anchors.
As I already mentioned, I didn’t attach the shelf to the brackets. It hasn’t been a problem this far, but when kiddo gets tall enough to reach it from the sofa, it could be. So attach your shelf! Oh my gosh I feel my OCD level creeping up…
And last but not least, I didn’t let this sucker air out in a “well-ventilated” area, so my living room smelled like stain for a day or two. It was bearable, but it’s probably better to let it dry out for at least 24 hours before bringing it inside.
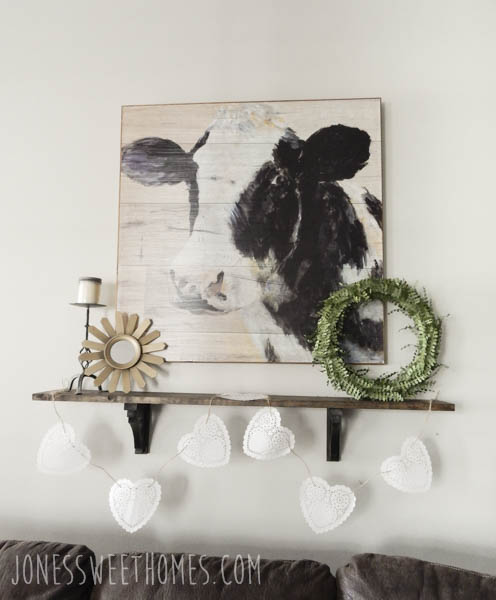
That’s my two-second DIY Valentine’s garland made of a pack of $1.99 doiles and twine that I already had.
And that’s it!
What do you think of this quick and easy DIY Farmhouse Shelf? Do you have a space in your home that could use one? I can’t wait to see what you geniuses come up with!
As always, thank you so much for stopping by the blog today! 🙂

Leave a Reply