I wanted to name this post “Painting Cabinets DIY (The Quickest, Easiest Way, But It’s Still Intense)”, but apparently that title was too long. Psssh. I got the bright idea to tackle this massive project on my own while the hubster was traveling for work. See, he said we couldn’t do it ourselves and make it look good. I said we could. I was right(ish), but man did I pay hard to prove my point. Here are the lessons I learned, the materials I used and why, the cost, and the lowdown on physical recovery time from my Painting Cabinets DIY!

Thankfully our kitchen cabinets had been painted white already, so that left us with four bathrooms. FOUR. Why do we have this many bathrooms?! Regardless, we do. And they all needed to be painted. Two bathrooms have single cabinet sink bases, the girls’ bathroom has a double sink base, and our bathroom has 30,000 cabinets. Not really, but it felt like it.
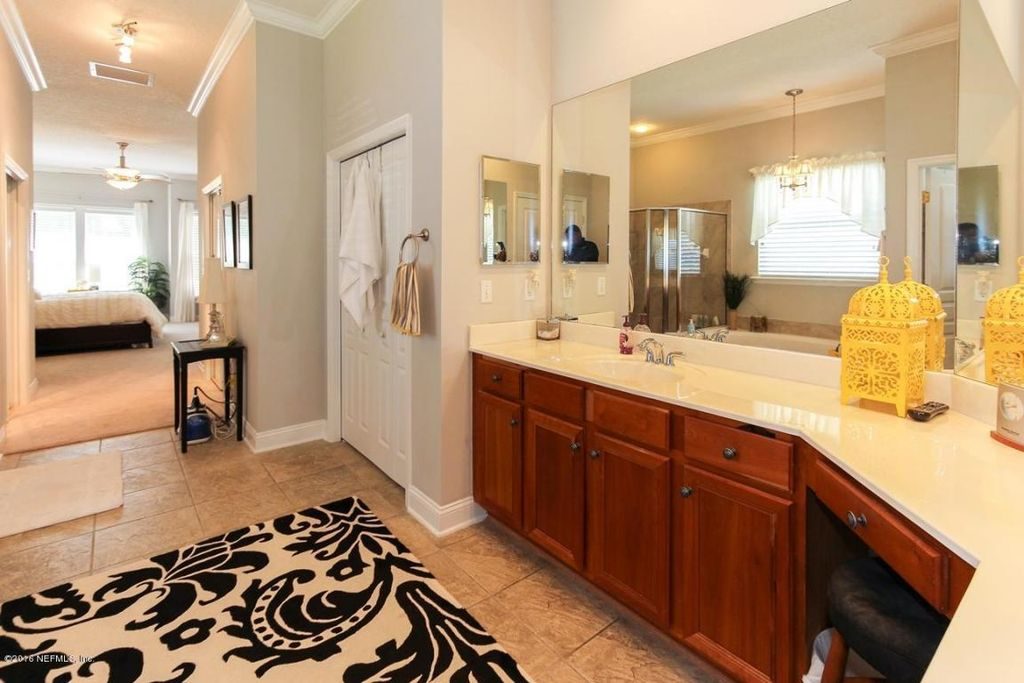
Listing photo. This is the cabinet finish that we started with in all four bathrooms.

Because my full time job obnoxiously gets in the way of these DIY endeavors, I was only able to work on this project in the evenings. Knowing that I only had three nights, I researched and read a ton of tutorials, and modified them to suit my impatience short timeline.
I’ll go over the materials and why I chose them later in this post. Here are the steps.
PAINTING CABINETS DIY STEPS
1) PREP.
Prep and clean up are the most annoying parts of the job to me, but they’re so necessary. I set up in the garage and left my car parked in the driveway. I purchased some firring strips from Lowe’s ($2.57 each, I bought six) to lay the cabinet doors on, so they would be off the ground. You’ll need enough space to lay each cabinet door out.
Gather all of your supplies. Paint, primer, paint brushes, paint trays, small “cabinets and doors” rollers, old rags, a degreaser, blue painter’s tape, drop cloths, paint sprayer, drill/screwdriver/cordless screwdriver, paper, a Sharpie, and Ziploc bags. Also, if you’re smart, a mask and close-toed shoes.

I missed the memo on the close-toed shoes.
2) REMOVE CABINET HARDWARE & TAPE OFF CABINET BASES.
Write on the Ziploc bags to mark hardware from each bathroom and keep them separate. There were lots of weird parts and pieces that I was not expecting in our bathroom, so I took pictures of the stuff that wasn’t “the norm” to me, because I knew I’d forget. Take the doors off and stack them in your work area, MAKING SURE to keep each room grouped together. (Use the paper and your Sharpie to label each stack.)
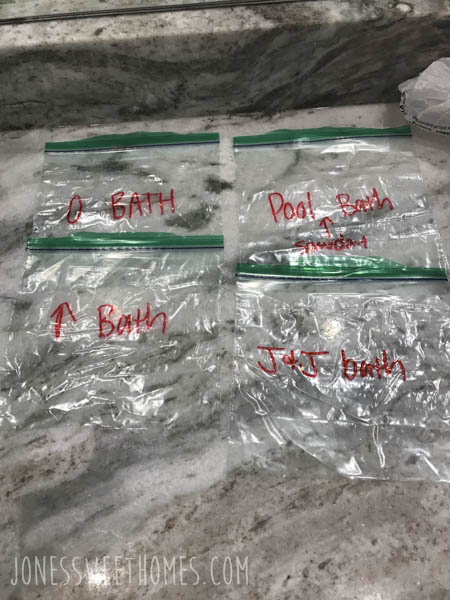
That’s “Pool (Someday) Bath”…
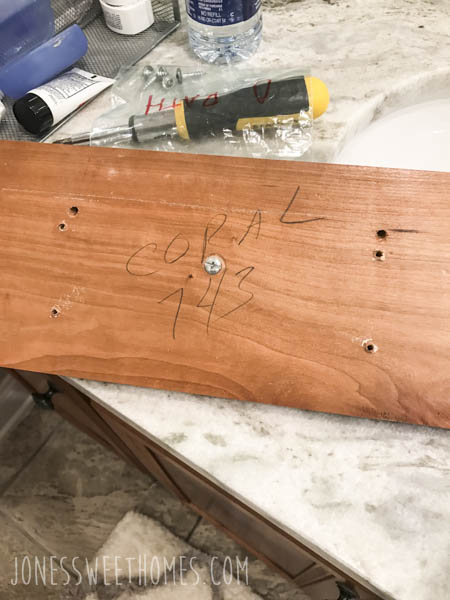
Apparently these cabinets were “coral” color?
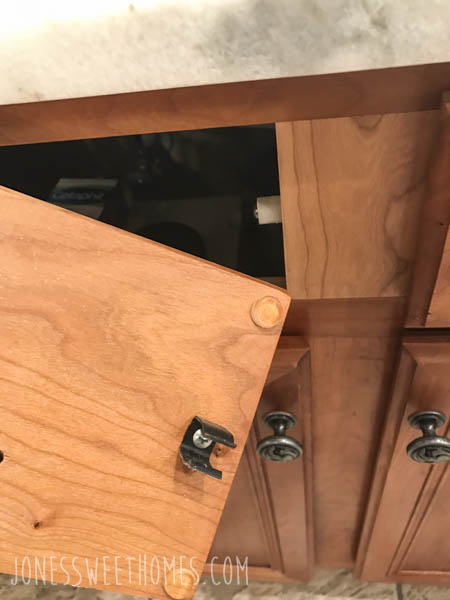
The stationary “faux” drawer panels (usually under the sink) will just pull right off. They’re held on to little round pegs with these clips. Remove those plastic bumpers before you clean the doors.
Use blue painter’s tape to tape off the floors and side walls of the cabinet bases. *Note: I did not remove the stuff from our cabinets. Please reference aforementioned timeline and impatience.

3) LIGHTLY SAND DOORS AND CABINET BASES.
I skipped this step in the interest of time. I also have massive paranoia that one day all of the paint is just going to literally fall off of our cabinets. If you can bear it, I’d strongly, strongly recommend lightly sanding all of the cabinet doors and bases with a sanding block.
4) CLEAN EVERYTHING WITH A DEGREASER.
TSP is the recommended cleaner. I used Goof Off degreaser. Soak your rag and wipe down every surface. Pay particular attention to the areas around any cabinet knobs (i.e. where grubby paws touch the most).
Surprisingly, this step took much longer than I thought it would. About halfway through wiping down the third door I thought, “uh ohhhh… I have grossly underestimated this project, and my ability and desire to complete it on my own.” But it was too late, I had a point to prove.
5) PRIME.
I used a 2″ angled brush (get a good one, should be like $10) to do the “detailed” parts of the cabinet, and I rolled out the rest with the small cabinet and door roller.
You will be scared, REALLY SCARED, because the primer alone looks like garbage. It is streaky and does not completely cover the doors and you will think “OMG I’ve really messed up.” But it will be okay.
Paint the backs of the cabinets first, let them dry for an hour, and then flip them over and paint the fronts. (That way if you have any weird places that stick they’ll be on the back, not the front.) Let the primer dry for at least an hour. It was 1 a.m. when I finished this step, so I let them dry overnight.
6) PAINT.
After the hellscape that was night one of this project, It was clear to me that the only chance I had to get this mission accomplished before the hubster arrived home was to use a paint sprayer for all the doors. I purchased a Wagner sprayer for $99 at Lowe’s and set up a paint booth using lots of painter’s tape and a plastic drop cloth.
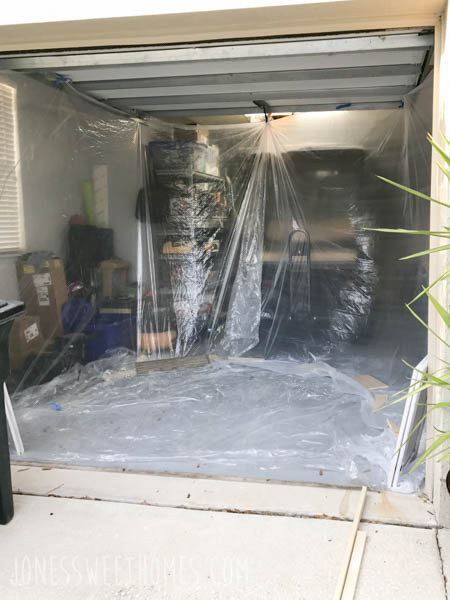
Poke small holes in your plastic so the wind doesn’t smash it into your wet paint!
You’ll want to use an actual cloth dropcloth for the “floor” of your paint booth. If you use plastic, you’ll end up with a ice skating rink made of paint because of the overspray. Yes, I learned the hard way.
I used the paint sprayer to do the doors first so that it would be a normal time of day and not wake up the entire neighborhood. It is LOUD, but amazing.
I used a big cardboard box with little paint pyramids to set up the doors to be sprayed. Again, start with the backs of the doors. Spray the backs, and do one run down each side edge.

Be sure to read all of the instructions for your paint sprayer. Never start your spray on the surface you’re trying to paint (that’s where splatters occur), and never run the sprayer out of paint. Also try to keep it as straight and upright as possible to avoid any drips.
When you’re done spraying, carefullllllly lay the doors out to dry and don’t even think about touching them for 24 hours.
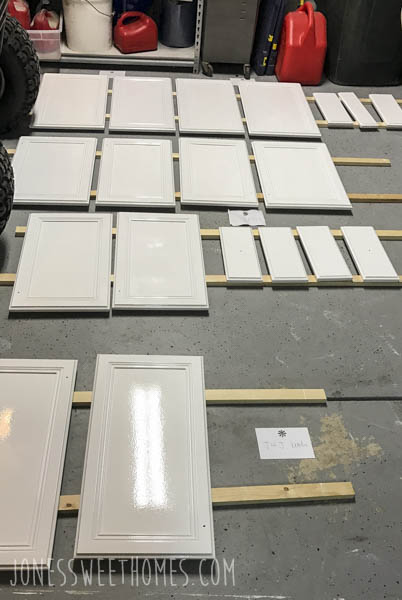
Look at ’em there. Pretty maids all in a row.
While the doors dry, paint the cabinet bases with your 2″ angled brush and small cabinet roller. Paint the vertical surfaces first, then the horizontal.
Let dry for 24 hours.
7) PAINT AGAIN.
For added fun, the next evening when it was time to spray the front of the cabinet doors, it was monsooning outside. I had to move my paint booth to the back wall of the garage, which actually worked better, because the wind caught the plastic several times and got stuck to stuff when I’d been painting the day before.
I used the same cardboard box and paint pyramid set up to spray the fronts of the doors. I went heavy with my spray because I knew good and damn well I was not planning on a second coat. Not just out of laziness, but I’d read many tutorials that said only one coat of paint over primer was better. So I went with it.
Paint a second coat on your cabinet bases.
8) LET PAINT CURE FOR A MINIMUM OF 48 HOURS.
It can take up to a solid month before your paint has completely cured, so no scrubbing, and try to keep your toddler from using the cabinet doors for practicing her kicks (this happened) for at least 30 days.

9) REPLACE HARDWARE, REHANG DOORS, REMOVE TAPE.
After a minimum of 48 hours (ideally 72), apply felt bumper pads to the top and bottom of each door, replace your hardware and hinges, and rehang the doors. Be careful when you’re removing the tape. Some of the paint on my 1/4 round trim on the floor came off when we ripped it up and I had to touch up a few places.
10) TOUCH UPS AND CAULK.
I did not caulk the doors before priming or painting, and it wasn’t really a problem except on the tiny bottom detail of the cabinet doors. Once the doors were reattached to the cabinet bases, we went back (yes, Lane was home to help at this point!) and used a tube of white caulk to do a small bead on that bottom detail and they were ship shape.
CABINET PAINTING DIY BREAKDOWN
MATERIALS USED:
1 Gallon of Zinsser 1-2-3 Primer
2 Gallons of Valspar Interior Latex Paint in Ultra White Semigloss. I didn’t use chalk paint because I didn’t like the sound of the prep work. I considered some of the “self-leveling” cabinet paints, but the more I read, the more it seemed like that made more sense if you were using rollers and brushes versus a paint sprayer. I also considered Lowe’s “Cabinet Enamel”, but I didn’t see anywhere that the can said it could be used in a paint sprayer, so I skipped that too. The last thing I wanted was to get my new sprayer all clogged up.
2 Angled Brushes, 2″. One for the primer, one for the paint.
Wagner Paint Sprayer
4 Cabinet / Doors Small Rollers
2 Small Paint Trays
1 Plastic Drop Cloth
1 Canvas Drop Cloth
DeWalt Drill. Screwdriver or cordless screwdriver would work too.
Blue Painter’s Tape
Ziploc Bags
Sharpie
TIME INVESTED:
A total of about 20 hours of work, 72 hours drying time, 48 hours cure time.
COST:
Paint & primer – $105
Sprayer – $100
Misc. Supplies – $70
TOTAL: $275 (Which was much better than the $2300 we were quoted to do this job, but after putting in the physical labor and time for myself, I would have charged $9,700 at minimum.)
THE RESULT
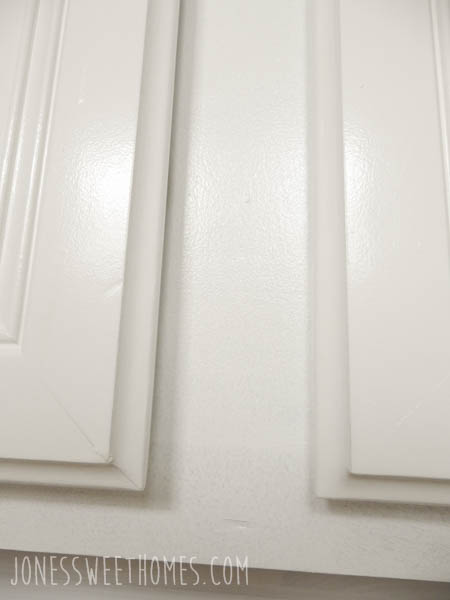
If you look reeeeally close you can see some brush strokes, but you definitely have to really look.
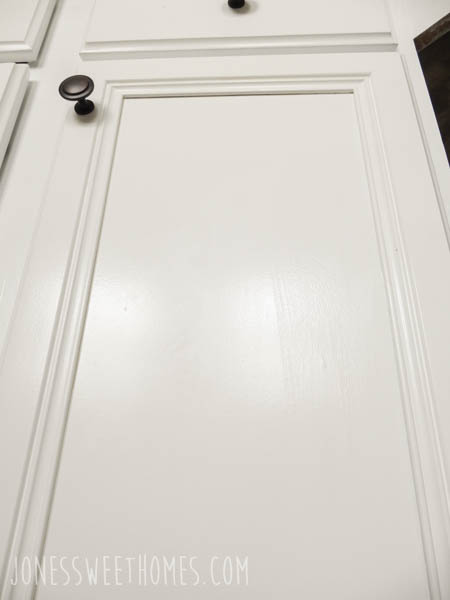
The center of this door is probably the “worst” spot that there is in the whole bunch. Just couldn’t get that drip all the way out, but I can live with it!
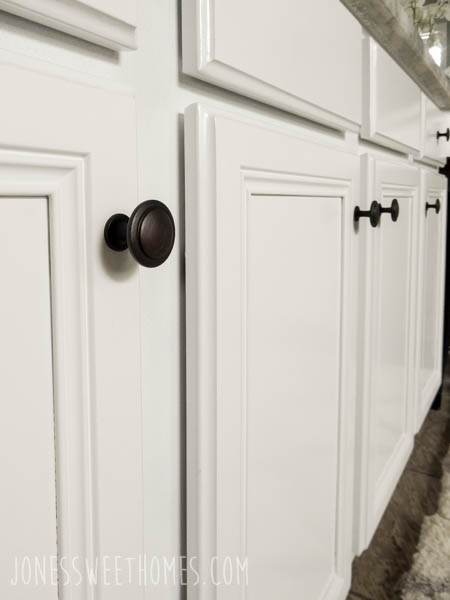
We used knobs again, so wood filler and sanding wasn’t necessary.
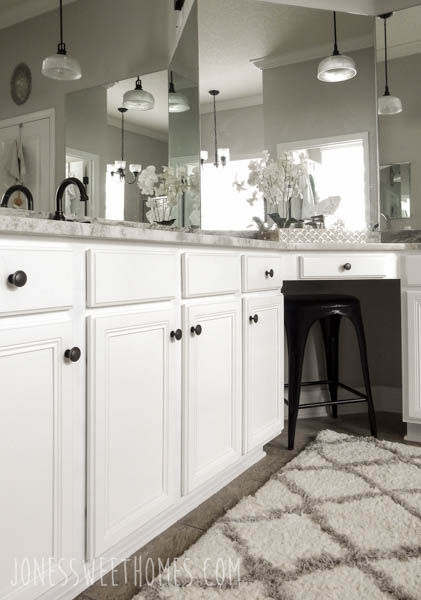
Muuuch better! And not too shabby!


It took me about a week to physically and mentally recover from the sleep deprivation, but the look on Lane’s face when he saw this massive project done upon his arrival home was totally worth it!
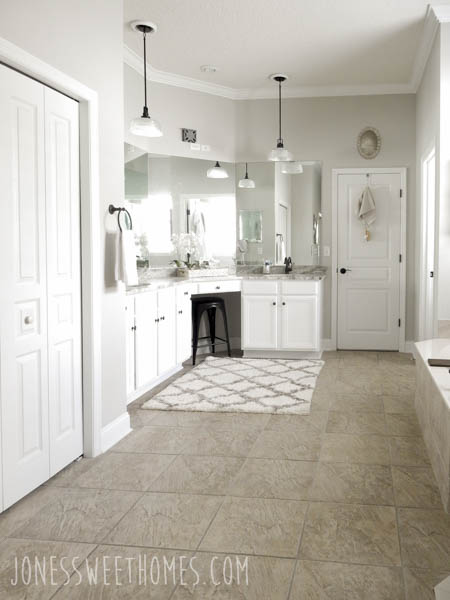
And that’s a wrap!
Thank you as always for stopping by the blog and coming along on our adventures!

HI! I found this via Pinterest and am excited to give it a try. I need to paint ALL of our home’s cabinets–like yours, they are honey oak. IN fact, my second bath looks almost identical to yours–the wall and door in between the sink and toilet/shower area? I have thought about ripping out that wall so many times . . . it seems so pointless to me. Anyway, I am a faithful chalk-paint user but have had reservations about using it on cabinets. I’m so glad to hear about this paint. Thanks for sharing a great post!
Girl power! Who said girls can’t get their hands dirty and turn those cabinets into magnificent looking units?